


Convert horizontal gameplay into vertical clips
Eklipse Studio is the gaming video editor you open after the stream. Crop, trim and reframe horizontal footage into 9:16 clips for TikTok, YouTube Shorts and Instagram Reels, with your HUD, facecam and captions where viewers can see them.

Reviews from people who edit in it
Seven platforms publish a score for Eklipse. All seven are below, ordered by how many reviews each one rests on rather than by which flatters us. The complaints behind the lower numbers land on pricing and processing time far more than on the editor, which is the part this page is about, so read the quotes too.
“It turns horizontal gameplay into vertical videos (9:16).”Roetoe_ · App Store review
“Before I found Eklipse, I was completely lost as far as editing videos from my live stream.”PainPhreak_Gaming · App Store review
“Eklipse.gg is honestly great for quick edits of your streams.”kingqb1103 · App Store review
“It allows me to grab clips a lot faster than spending hours in the other applications.”CarbonBlack13 · App Store review
“Definitely one the best video editors so far.”KKageI · App Store review
“They make it easy to edit and post clips. Truly convenient.”Dubemdegreat · App Store review
“It actually works really well … I love the edits too.”Xackonic · App Store review
“Great for editing videos and getting professional help with clips.”StillJoegrizzly · App Store review
Horizontal footage to a finished vertical clip
No keyframing, and no scrubbing an entire VOD on a timeline.
Bring in the footage
Upload a file, or paste a Twitch, Kick or YouTube link and let Eklipse pull the VOD.
Trim to the moment
Set in and out points so the reframe only has to follow the part you are keeping.
Pick a 9:16 layout
Full-frame, split, or facecam stacked over gameplay. Drag any region where you want it.
Caption and brand it
Auto captions, meme stickers, and your channel name sticker so reposts still credit you.
Export vertical
Out comes a 9:16 clip sized for TikTok, Shorts and Reels. No black bars, no stretching.
The edits people actually come here to make
People search for each of these by name. Answered in the order they usually come up.
Crop a gameplay video to vertical
Open the clip in Studio and pick a 9:16 layout. Studio crops around the action instead of the centre of the frame, so a kill feed on the right edge or a facecam in the corner does not get cut away. Drag any region if you want it somewhere else.
Edit a YouTube video for Shorts
After clipping the VOD, open a cut in Studio, switch it to 9:16, then add captions and stickers. What you export fits the Shorts frame, with no letterboxing.
Clip a YouTube video
Paste the YouTube URL. Eklipse pulls the VOD, finds the moments worth keeping and hands you the cuts. Open any of them in Studio to reframe and finish.
Edit a clip you already have
Upload the file directly. Studio does not need the clip to come from a connected stream, so old recordings and clips from other tools still work.
Add your channel name sticker
Add a text or channel-name sticker from the sticker panel, then place and resize it anywhere on the vertical canvas. Viewers who see the clip reposted still see who made it.
Crop a clip for TikTok
Use the 9:16 layout and keep the important gameplay in the middle band of the frame. TikTok covers the top and bottom of the screen with its own interface, so anything parked at the edges gets hidden.
Trim a TikTok clip
Set the in and out points on the timeline before you reframe. Trimming first means the auto-reframe only has to track the part you are keeping.
Make a clip for Instagram Reels
The same 9:16 export, and captions matter more here because a lot of Reels playback starts muted. Add them before you export.
Have someone else edit it
If one clip matters more than the rest, Pro Edits puts it in the hands of Eklipse’s editors and you skip the timeline.
Start from a vertical template
Templates arrive with the layout, caption style and sticker positions already set. Pick one, drop your clip in, export.
Add auto captions
Studio transcribes the clip and generates captions you can restyle. Fix any word the transcript got wrong in the caption editor. No re-recording.
A crop loses the reason the moment was good
Generic croppers cut a 9:16 box out of the middle of your frame. Studio rebuilds the frame instead.
Reframing built around the action
A centre crop cuts off whatever is not in the middle of a 16:9 frame: your kill feed, your minimap, your facecam. Studio builds the vertical frame around the part of the shot that matters and follows it as the action moves.
- Follows the action as it moves across the frame
- No black bars, no stretched footage
- Reposition any region by hand if you disagree with it

Your HUD and facecam get their own space
A 9:16 canvas is taller than it is wide, which leaves room to stack. Put gameplay in the middle, facecam above it, HUD below, each one its own layer you can move and scale.
- Facecam-over-gameplay stacked layouts
- Reposition each region independently
- Split and full-frame layouts for clips that do not need a facecam
Captions for everyone watching with the sound off
Studio transcribes the clip and generates captions you can restyle word by word, so muted viewers on TikTok and Shorts still follow what happened.
- Auto captions on vertical clips in one pass
- Kinetic styles, editable word by word
- Fix transcript mistakes without re-recording
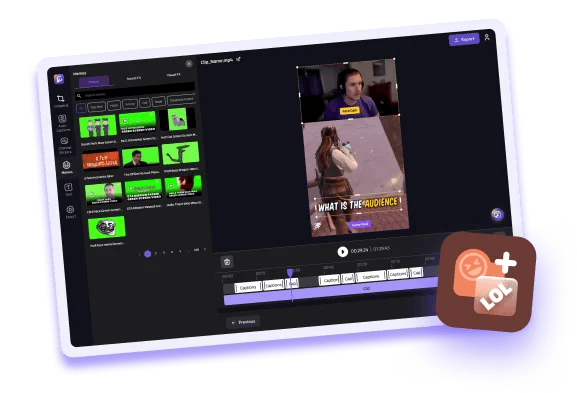
Channel name stickers and meme triggers
Every clip you post is promotion for the channel it came from. Add a channel name sticker so a repost still credits you, and drop meme stickers on the beat of the moment.
- A channel name sticker on every export
- Position, restyle and resize freely
- Meme stickers timed to the moment
Built for whatever you stream
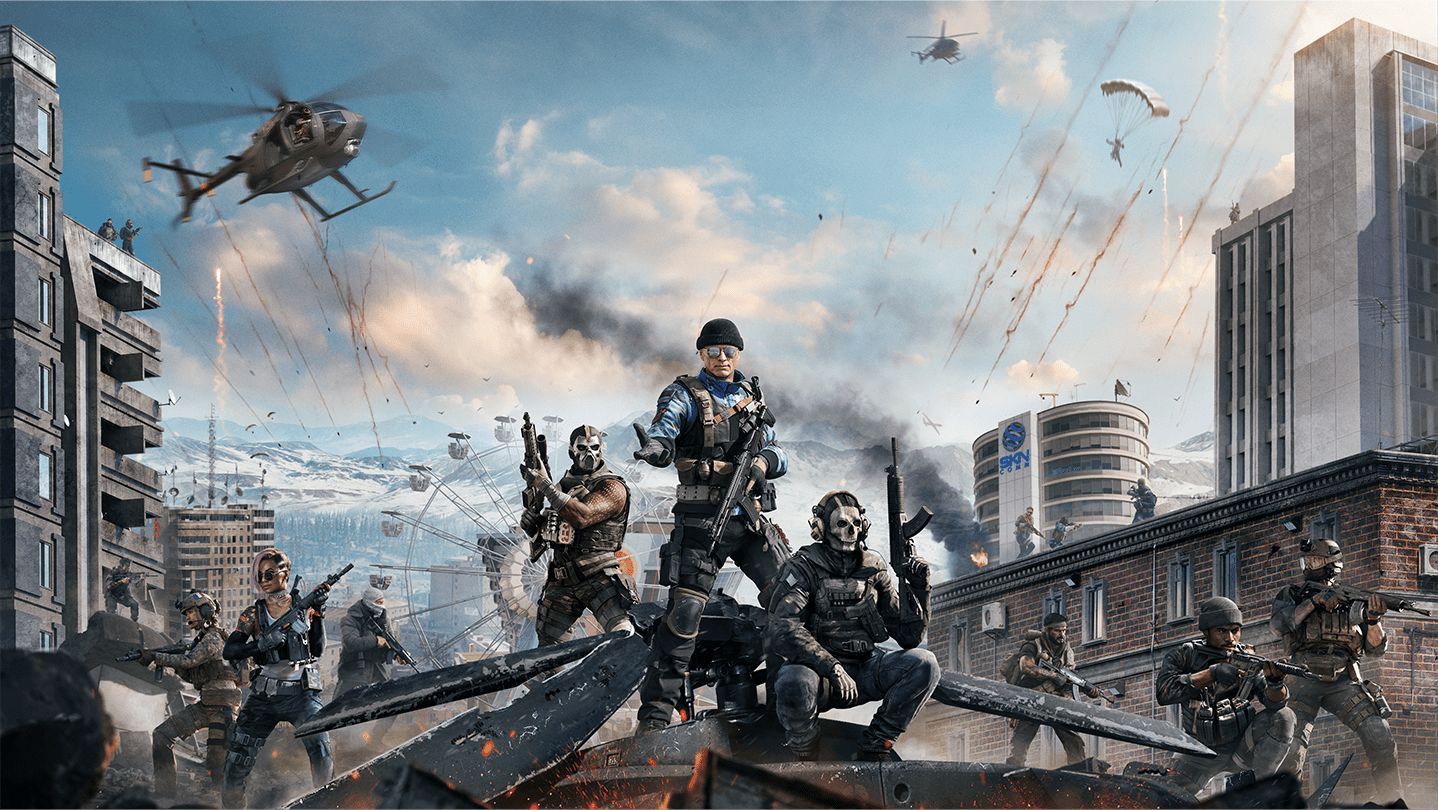
A Warzone kill feed sits on the right edge. A Valorant ace reads out of the killfeed. A Marvel Rivals teamfight fills the whole screen. A Just Chatting reaction is all face and no HUD. Each one needs a different vertical frame. A fixed centre crop fails all four. Pair a clip with the Warzone highlight clipper or the Valorant highlights flow, then finish it here.


Eklipse Studio questions
What is Eklipse Studio?
Eklipse Studio is Eklipse’s clip editor. You open a clip in it to reframe horizontal gameplay into a vertical 9:16 video, stack gameplay and facecam, trim, add captions and stickers, then export for TikTok, YouTube Shorts and Instagram Reels.
How do I crop a video in Eklipse Studio?
Open the clip in Studio and choose a 9:16 layout. Studio builds the vertical frame around the action, so HUD elements and your facecam stay visible. Any region can be dragged or resized by hand.
Can I clip a YouTube video and edit it in Studio?
Yes. Paste the YouTube URL, let Eklipse pull the VOD and produce cuts, then open any cut in Studio to reframe it, caption it and export it as a Short.
How do I add my channel name sticker to a clip?
Add a channel-name or text sticker from the sticker panel, then place and resize it on the vertical canvas. It exports with the clip, so reposts still credit your channel.
How do I trim or crop a clip for TikTok?
Set your in and out points first, then apply the 9:16 layout. Keep the important gameplay in the middle band of the frame, because TikTok’s own interface covers the top and bottom of the screen.
Can I convert a horizontal video to vertical for free?
Creating an Eklipse account is free, and the standalone browser tools at eklipse.gg/tool handle one-off conversions at no cost. Editing inside Studio runs on a paid plan.
What aspect ratio should gaming Shorts and Reels use?
9:16 is the full-screen vertical format for TikTok, YouTube Shorts and Instagram Reels. Studio is built around that ratio.
Does Studio find the highlights, or do I pick the clips?
AI Highlights finds the moments in your stream. Studio is the step after that, where you edit and reframe a clip you picked.
Can I add auto captions to a vertical clip?
Yes. Studio transcribes the clip, generates captions, and lets you restyle or correct them before export.
Can I edit clips on my phone?
Yes, through the Eklipse mobile app, which also lets you review and post the clips you exported.
The rest of the workflow
Studio is the editing step. These are the other parts of the workflow.

AI Highlights
The AI finds your best stream moments; Studio is where you edit them.
Explore →
AI Edit
A one-pass automatic edit for when you do not want to open the editor at all.
Explore →
Ultra Highlights
Longer, higher-quality highlight cuts from a full session.
Explore →
Clip Editing App
The wider clip-editing toolset around Studio.
Explore →
Twitch Clips to Reels
Take an existing Twitch clip straight to a Reels-ready vertical cut.
Explore →
Twitch Clip Editor
Edit Twitch clips without leaving the browser.
Explore →
Kick Clips
Pull clips from Kick streams into the same vertical flow.
Explore →
Kick Highlights
Automatic highlight detection on Kick VODs.
Explore →
TikTok Clips
Vertical output sized and captioned for TikTok.
Explore →
TikTok Live
Clip your TikTok Live sessions the same way.
Explore →
Voice Command
Say “clip it” mid-game and keep playing.
Explore →
Automate Stream Clips
Set it once and let every stream produce clips on its own.
Explore →
Content Planner
Schedule and publish the vertical clips you exported.
Explore →
Content Agent
A hands-off content pipeline across your channels.
Explore →
Console Capture
Get PlayStation and Xbox gameplay into Eklipse.
Explore →
Mobile App
Review, edit and post clips from your phone.
Explore →
Pro Edits
Hand a clip to Eklipse’s editors when you want it finished for you.
Explore →Stop cropping. Start reframing.
Connect your account and turn tonight’s horizontal VOD into a stack of vertical clips.
